A Himalayan salt wall is one of the most striking upgrades you can add to a sauna. When backlit, the natural salt bricks produce a warm amber glow that transforms the space into a relaxing wellness environment. Salt walls are commonly installed in infrared saunas, traditional saunas, spas, and wellness rooms, and they can be built with relatively simple materials.
In this guide, we'll walk through the basic principles of building a salt wall, including laying a foundation, lighting, how to calculate exactly how many bricks you’ll need, and most importantly how to lay the bricks
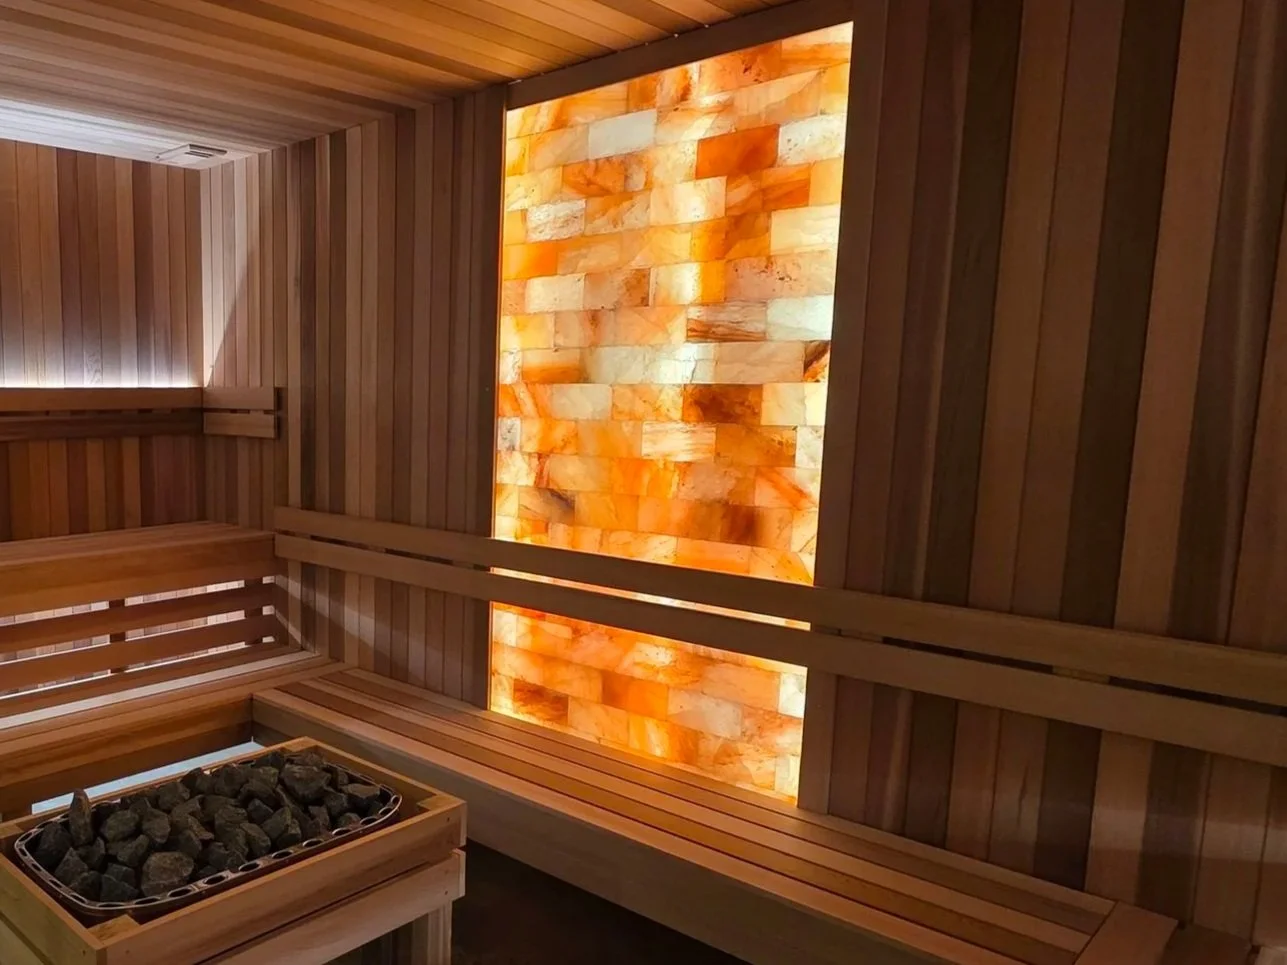
Himalayan salt walls are popular in sauna design because they combine visual warmth with natural materials. When illuminated from behind, each brick glows slightly differently, creating a unique textured appearance.
Common benefits include:
• A warm ambient glow that enhances relaxation
• A premium spa-style feature in your sauna
• A natural material that complements cedar interiors
• A striking visual focal point behind benches or backrests
Salt walls work particularly well in infrared saunas, where the environment is warm but relatively dry.
Plan Your Salt Wall Location
The first step is deciding where the wall will go. Most salt walls are installed:
• Behind the backrest of the main bench
• As a full rear feature wall
• In a vertical column feature beside a heater
Make sure there is enough depth in the wall cavity to accommodate:
Salt brick thickness (50mm)
LED lighting space
Ventilation space behind the wall
A typical cavity depth of 70–100mm works well.
Build the Support Base
Salt bricks should not simply be stacked loose, or placed directly on the ground.
For installations at floor level, the salt wall should sit on a solid masonry base to provide stability and protection from moisture.
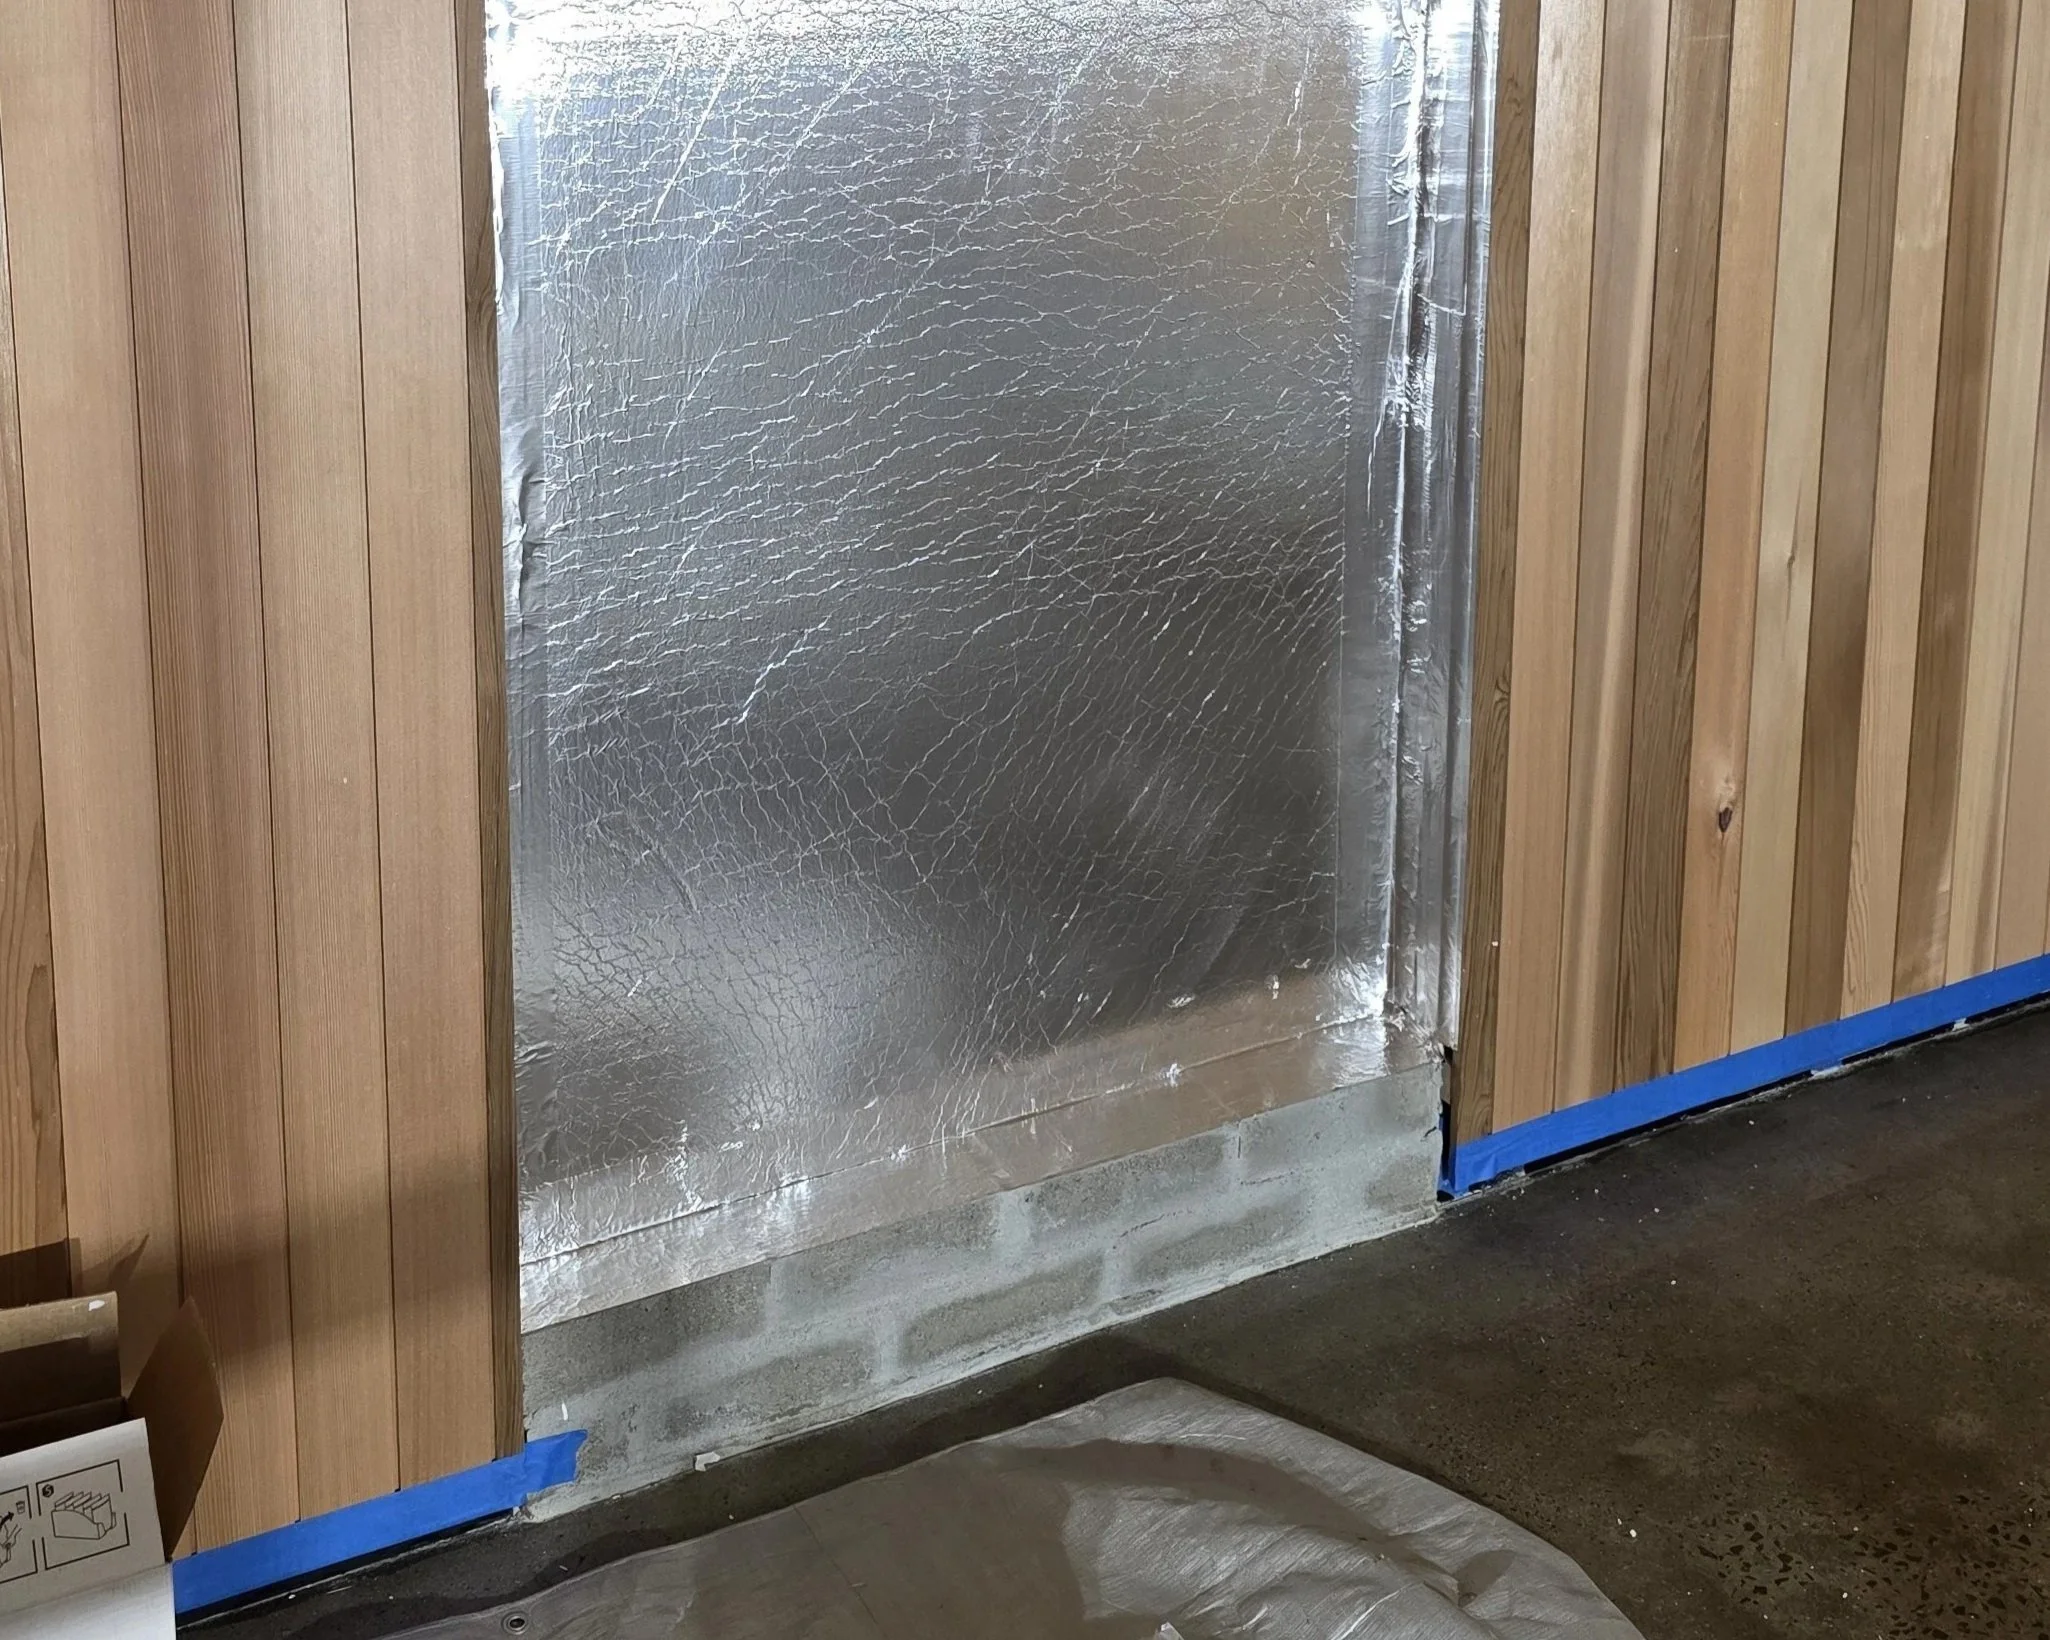
A common method is to construct a core-filled concrete block foundation, where standard concrete masonry blocks are laid, reinforced if required, and the cores filled with concrete to create a rigid and durable base. Before installing the salt bricks, apply a waterproof membrane or damp-proof course (DPC) across the top of the foundation to prevent rising moisture from being drawn into the salt.
Once the membrane is in place, the salt bricks can be installed on top of the prepared base using a suitable adhesive
Note:
Because Himalayan salt is hygroscopic and can absorb water, this waterproof layer is essential to prevent rising damp, which could otherwise cause the bricks to deteriorate over time.
Install LED Backlighting
Lighting is what makes a salt wall really shine.
Use low-Voltage LED strip lighting behind the bricks.
Best practices:
• Cool white –4000K LEDs (The bricks natural colour will diffuse the light)
• Even spacing across the wall
• Diffuse lighting if possible
• Leave ventilation space behind bricks
Avoid high heat lights. LED is essential for longevity and safety.
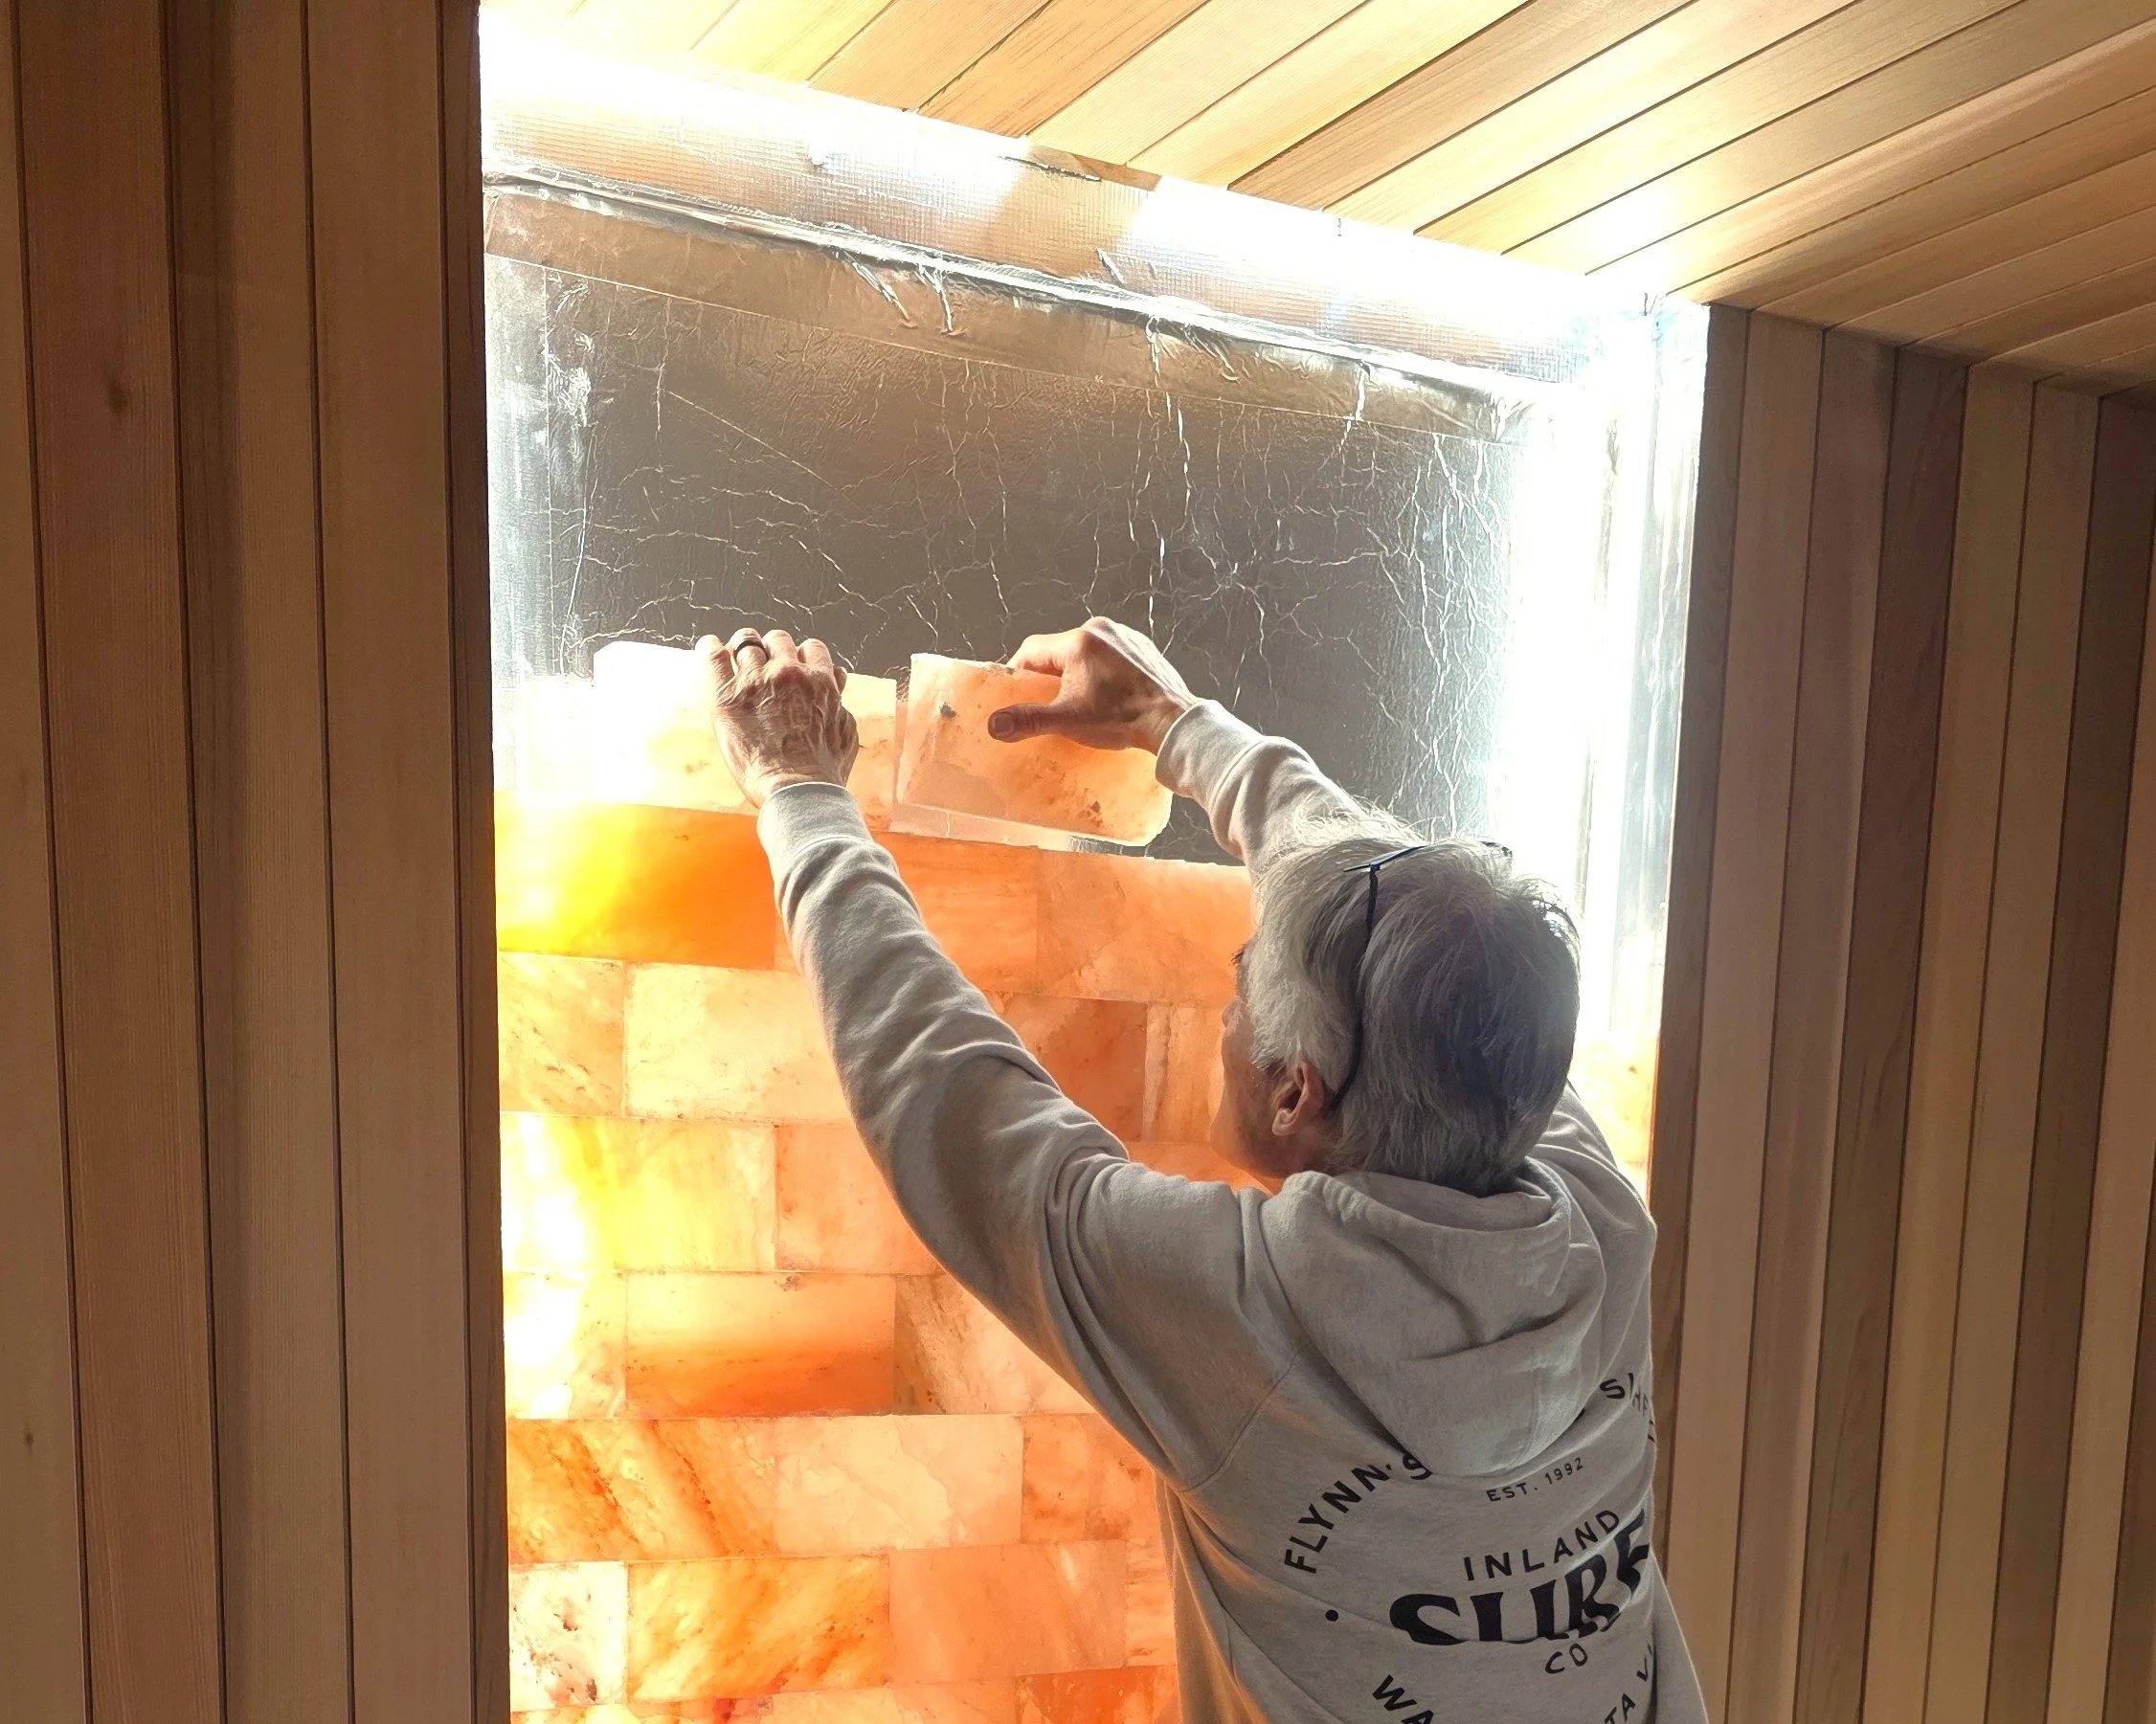
Installing the Salt Bricks
Salt bricks typically measure: 50 × 100 × 200mm
Salt bricks should be laid in an offset pattern, similar to a standard brick wall, where each course is staggered so the vertical joints do not line up. This improves the stability and visual appearance of the wall.
The bricks can be fixed using a specialised adhesive which is supplied in a standard caulking tube, applied in beads to the contact surfaces before positioning each brick. as a rule the adhesive should be applied to the entire length on the surface being adhered to, with two 3-5mm beads being sufficient
As the wall progresses, some bricks may need to be trimmed to fit edges or corners. Himalayan salt bricks are relatively soft and can be cut with a hand saw, brick saw, or angle grinder with a suitable masonry blade. When cutting, work carefully to avoid chipping and ensure accurate fits.
Include a clear PVC brick tie approximately every 5 courses, fixing it back to the supporting wall to help secure the salt brickwork and provide additional lateral stability while remaining visually unobtrusive
Once the salt bricks are installed, a perimeter trim can be fitted flush with the surrounding wall to neatly frame the installation and provide additional support to the outer edges of the brickwork. This trim can be made from a matching material such as cedar, chosen to complement the surrounding sauna interior
Once installation is complete, it is important to clean all tools thoroughly, as salt residue can attract moisture and is corrosive to metal surfaces if left on tools or equipment.
How to Calculate How Many Bricks You Need
This is the most common question when planning a salt wall.
Because each brick face is 20 cm × 10 cm, we can easily calculate coverage.
Area Covered by One Brick
20 cm × 10 cm = 200 cm²
Bricks Per Square Metre
1 square metre = 10,000 cm²
10,000 ÷ 200 = 50 bricks
✔ 50 bricks cover approximately 1 square metre
Quick Brick Calculator
Wall SizeBricks Needed1 m²50 bricks1.5 m²75 bricks2 m²100 bricks3 m²150 bricks4 m²200 bricks
Example Calculation
Wall size:
2000mm wide × 600mm high
Convert to metres:
2.0 × 0.6 = 1.2 m²
1.2 × 50 = 60 bricks required
Always order 5–10 extra bricks to allow for cutting or breakage.
Installation Tips for Sauna Environments
To get the best lifespan from your salt wall:
• Install in dry sauna environments
• Ensure ventilation behind the wall
• Use LED lighting only
• Avoid high steam exposure
• Protect bricks during installation (salt chips easily)
Final Thoughts
A Himalayan salt wall is one of the most beautiful upgrades you can add to a sauna. With simple framing, LED lighting, and the correct number of bricks, you can create a stunning feature that gives your sauna a true spa-quality finish.
If you need salt bricks, installation advice, or replacement sauna parts, the team at Infrared Sauna Repairs can help.